Ten artykuł nie jest dostępny w twoim języku. Oryginalny język źródłowy jest pokazany poniżej.
- Ensure the camera is connected to the network with an Ethernet cable.
- Start the App “CamLine Pro”.
- Make sure the camera you wish to configure to connect to the WiFi is already added to the camera list and is already listed in the camera overview.
- Open the menu of the camera by pressing the
 button in the camera you wish to add to the WiFi network.
 - Press
 .
. - Select “Advanced settings”.
- Select “WiFi”.
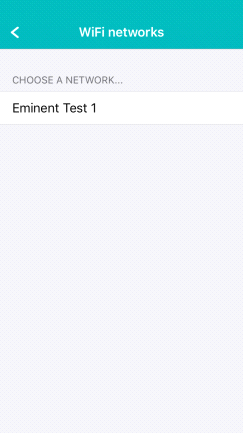
- A list of available WiFi networks is displayed.
- Select the WiFi network you wish to connect to.
- Enter the wireless encryption key and press “Connect”

- To activate the WiFi connection disconnect the Ethernet cable.
After successfully adding the camera to the WiFi network the Camera will need some time to switch to your WiFi this is not immediately. If you wish to speed up the process unplug the power adapter and plug it back in the camera so the camera will reboot and connect to the WiFi directly.
The camera needs a stable WiFi signal and bandwidth to be able to broadcast the video over the Network/Internet. If you notice the video stream is not viewed correctly in the APP/software/webinterface. You will need to set the resolution of the camera lower to be able to view the video correctly.
Below you can find an overview of an estimated Bandwidth solely needed per camera per resolution.